 Skip to content
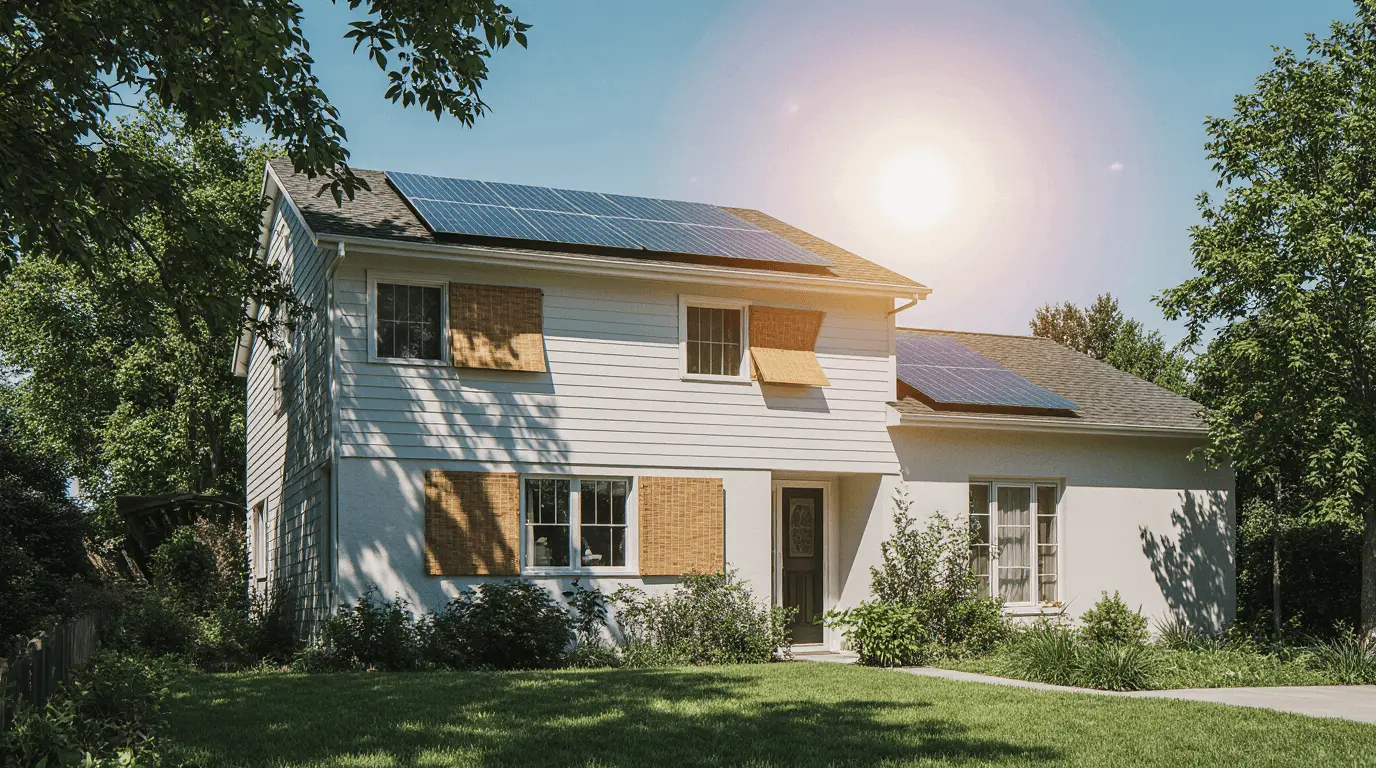
While your own neighbors are compelled to run their ACs day and night through this record-breaking heat wave, smart homeowners are discovering a revolutionary secret to keep cool. Say hello to Sarah of Phoenix, who dropped her cooling bill last summer to $230 from $380 a month with nothing more than genius passive cooling secrets – even when it was more than 105°F outside.
The trick? Passive cooling techniques that collaborate with nature, not against it. That means they don’t require a great deal of costly equipment or professional, high-priced installation. In fact, most natural home cooling solutions can be completed over the course of a weekend using everyday tools and minimal expense.
Ready to make your home a hip hideaway without bankrupting yourself? Here are seven cutting-edge strategies making it easy for thousands of home owners to cool their homes without cooling their wallets.
Table of Contents
The $200 Monthly Problem Every Homeowner Faces
Summer electrical bills are soaring nationwide. The average American household now spends over $400 per month for cooling costs during hot summer days. Traditional air conditioners not only are expensive to run, but they also strain the grid during heat waves.
Passive cooling is a more intelligent option. By learning about how heat gets in and circulates through your home, you can design a cool building that needs very little energy input. It’s been applied for centuries in warm parts of the globe – from the courtyards of the Mediterranean to wind towers of the Middle East.
Simply put, science isn’t much simpler: rather than combating heat with energy-hungry cooling, passive cooling channels, stops, and ventilates hot air naturally before it is an issue.
Method 1 – The Thermal Chimney Effect: Cool House Without AC
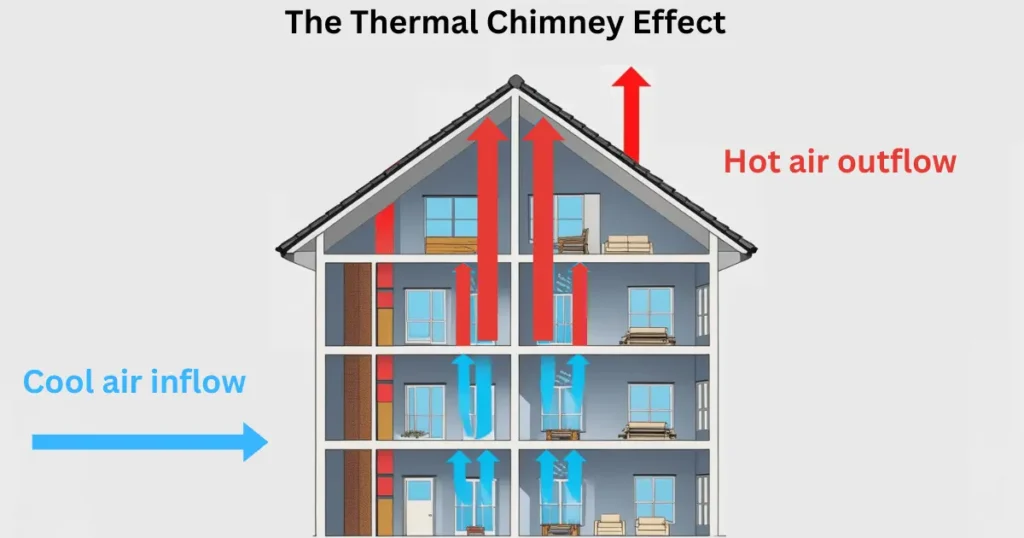
The thermal chimney effect is nature’s air conditioner. With its proper application, this passive cooling method can cool the indoor temperature by 8-12°F without consuming any electricity. How the Thermal Chimney Works: Hot air rises, and cool air falls. By smartly opening lower-level windows on the shaded side of your dwelling and upper-level windows or attic vents on the opposite side, you create a natural breeze that sucks the warm air up and out while bringing cooler air in.
How the Thermal Chimney Works
Hot air naturally rises while cool air sinks. By strategically opening lower-level windows on the shaded side of your house and upper-level windows (or attic vents) on the opposite side, you create a natural airflow that pulls hot air up and out while drawing cooler air in.
Here’s your step-by-step installation:
- Evening Setup (6 PM): Open lowest-level windows on your home’s shaded side
- Make Exit Points: Open upper-level windows or attic vents on the other side
- Maximize Flow: Position fans in upper windows to assist in removing hot air
- Morning Seal: Close all the windows no later than 8 AM to retain cool air indoors
Result: Homeowners report maintaining cozy 78°F indoor temperatures through 2 PM, even during days when outdoor temperatures exceed 95°F.
This DIY cooling solution costs absolutely nothing and can be implemented tonight. The key is consistency – make this part of your daily routine during summer energy savings season.
Method 2 – Strategic Shade Warfare: Block Heat Before It Enters
Shading is the most effective passive cooling method available. A shaded home can be 15-20°F cooler than an unshaded home. The secret is in shading the sun radiation before it hits your windows and walls.
Fast Shade Solutions
Exterior shade screens on the outside are your first line of defense. Exterior screening, as compared to interior blinds, which trap heat between glass and shade, prevents up to 90% of solar heat from entering your windows.
Top products for natural home cooling:
- Bamboo roll-up blinds (green, natural and sustainable)
- Solar mesh screens (expert-level cooling)
- Shade cloth (adjustable coverage)
Installation tip: Mount screens 6-12 inches from windows to facilitate air movement and prevent heat trapping.
Long-Term Landscaping for Maximum Cooling
Thoughtfully planted trees offer the highest ROI of any passive cooling investment. A mature shade tree can cool your home’s outside walls by 20-40°F and boost property value.
Best tree placement for cooling during heat waves:
- South and west sides: Place deciduous trees 15-25 feet away from your house
- East side: Use small trees or big shrubs
- North side: Use evergreen trees to benefit year-round
Quick-growing cooling winners: Silver maple, red oak, and tulip poplar offer great shade in 5-7 years.
Method 3 – Radiant Barrier Revolution: Reflect Heat Away
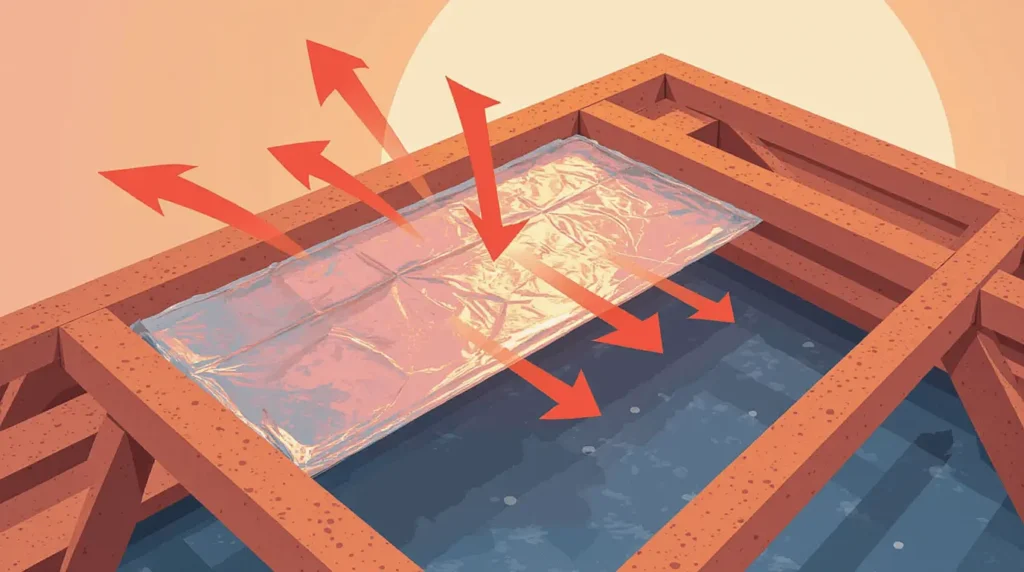
Radiant barriers are the secret weapon of passive cooling experts. These reflective materials can reduce attic temperatures by 16-20°F, dramatically decreasing the heat load on your cooling system.
Understanding Radiant Heat Transfer
Unlike traditional insulation that slows heat conduction, radiant barriers reflect heat before it can transfer. Think of them as mirrors for heat energy – up to 97% of radiant heat bounces back instead of entering your home.
Prime installation locations:
- Attic floor (easiest DIY project)
- Attic rafters (maximum effectiveness)
- Exterior walls (advanced installation)
DIY Installation for Maximum Summer Energy Savings
Materials needed:
- Radiant barrier foil (perforated for moisture control)
- Staple gun and heavy-duty staples
- Utility knife
- Work lights and safety equipment
Installation process:
- Prep the space: Clear attic access and wear protective gear
- Roll and cut: Measure barrier material to fit between joists
- Staple securely: Attach every 6-8 inches along edges
- Seal gaps: Overlap seams by 2 inches minimum
Cost comparison: DIY installation costs $200-400 versus $2,000+ for professional installation. The energy savings typically pay for materials within the first summer.
Method 4 – The Night Flush Technique: Cool House Without AC All Day
The night flush technique is a passive cooling strategy that captures cool nighttime air and seals it inside during hot days. When executed properly, this method can maintain comfortable temperatures until mid-afternoon.
Timing Is Everything
The golden window: Most regions experience a 15-20°F temperature drop between 2 AM and 6 AM. This is your opportunity to exchange hot indoor air with cool outdoor air.
Automated night flush setup:
- Programmable thermostats set to increase ventilation at 2 AM
- Window fans on timers to maximize air exchange
- Smart home integration for hands-free operation
Sealing Strategy for Daytime Cooling
By 8 AM, reverse the process. Seal your home tightly to trap the cool air inside. This creates a thermal battery effect that maintains comfortable temperatures for hours.
Essential sealing checklist:
- Close all windows and lock them tight
- Draw blackout curtains on sun-facing windows
- Turn off unnecessary heat-generating appliances
- Activate ceiling fans for air circulation
Pro tip: Use a digital thermometer to monitor the optimal closing time. When outdoor temperature equals indoor temperature, it’s time to seal up.
Method 5 – Heat Source Elimination: Winning the DIY Cooling Solutions Game
Every appliance in your home generates heat. During heat wave conditions, eliminating unnecessary heat sources can make the difference between comfort and misery.
Kitchen Heat Management
Your kitchen is likely the biggest heat generator in your home. Smart cooking strategies can reduce indoor temperatures by 5-8°F during peak hours.
Cool cooking strategies:
- Microwave meals generate 75% less heat than oven cooking
- Outdoor grilling moves heat production outside
- Pressure cooking reduces cooking time and heat output
- Cold meal planning eliminates cooking heat entirely
Appliance scheduling for summer energy savings:
- Run dishwashers at night or early morning
- Use slow cookers on covered porches or garages
- Air-dry dishes instead of using heated dry cycles
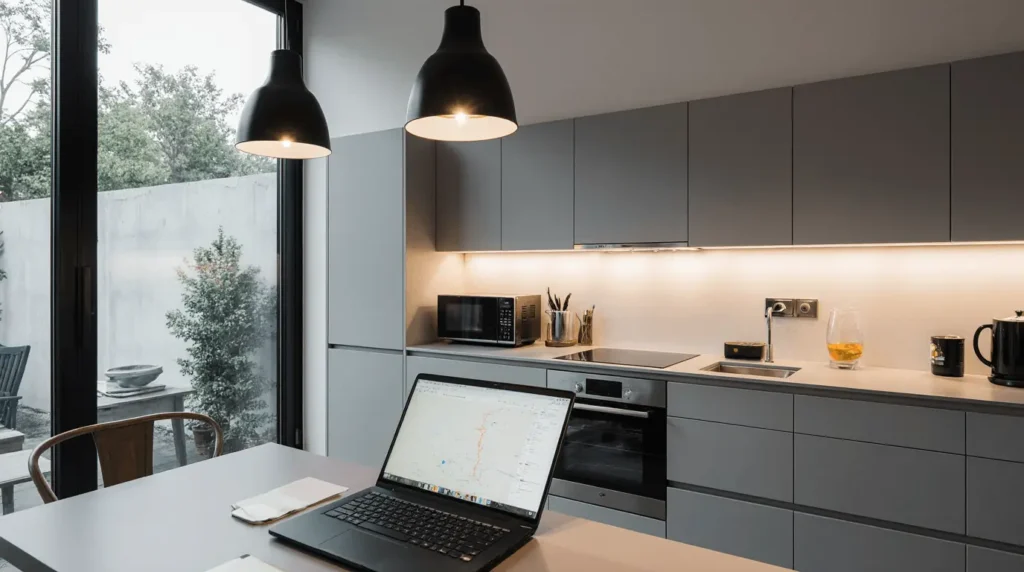
Lighting and Electronics Heat Reduction
LED conversion is the fastest way to reduce lighting heat. Incandescent bulbs generate 90% heat and only 10% light, while LEDs produce virtually no heat.
Quick wins for natural home cooling:
- Replace bulbs in frequently used fixtures first
- Unplug electronics when not in use (vampire energy creates heat)
- Move heat-generating devices away from thermostats
- Use laptops instead of desktop computers when possible
Method 6 – Insulation Gaps: The Hidden Passive Cooling Leaks
Most homes lose 25-40% of their cooling efficiency through hidden air leaks. Finding and sealing these gaps is one of the most cost-effective passive cooling improvements you can make.
Detective Work: Finding the Sneaky Leaks
The smoke test method:
- Turn off all ventilation systems
- Light an incense stick or smoke pencil
- Walk around your home’s perimeter, watching smoke patterns
- Mark areas where smoke is drawn toward walls or blown away
Common leak locations:
- Door and window frames
- Electrical outlets and switch plates
- Attic hatches and basement doors
- Plumbing and electrical penetrations
DIY Cooling Solutions for Air Sealing
Essential materials:
- Weatherstripping for doors and movable windows
- Caulk for stationary gaps and cracks
- Foam sealant for larger openings
- Gasket tape for electrical outlets
Sealing priority order:
- Largest leaks first: Attic hatches and basement doors
- High-traffic areas: Main entry doors and frequently used windows
- Hidden leaks: Outlets, switch plates, and small penetrations
Results: Proper air sealing typically improves cooling efficiency by 10-15%, paying for materials within one cooling season.
Method 7 – Evaporative Cooling: Ancient Wisdom for Modern Heat Wave Cooling Tips
Evaporative cooling harnesses the natural cooling power of water evaporation. This passive cooling method works exceptionally well in dry climates and can provide significant relief even in moderate humidity conditions.
Simple Evaporative Techniques
The wet towel method:
- Hang damp towels in front of open windows
- Position fans to blow air through the moisture
- Re-wet towels every 2-3 hours for continuous cooling
- Results: 8-12°F temperature drop in immediate area
Spray bottle cooling:
- Mist yourself lightly before sitting in front of fans
- Spray bed sheets before sleeping (amazing for hot nights)
- Create fine mist in rooms using spray bottles
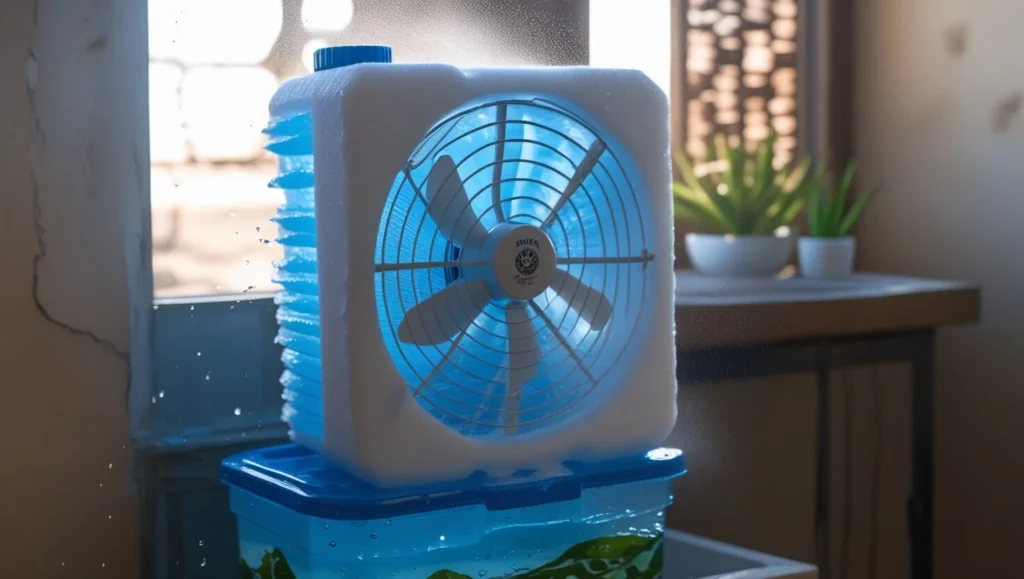
Advanced DIY Swamp Cooler Construction
For under $50, you can build an effective evaporative cooler that rivals commercial units.
Materials needed:
- Large Styrofoam cooler
- Small pump (aquarium pump works)
- Cooling pads or towels
- Small fan
- Tubing and basic tools
Performance: Homemade units can cool small rooms by 15-20°F in dry conditions while using 75% less energy than traditional AC.
Best conditions: Evaporative cooling works optimally when humidity levels stay below 60%. Check local weather conditions before implementing.
Your 30-Day Passive Cooling Implementation Plan
Transform your approach gradually with this proven timeline:
Week 1: Free Natural Home Cooling Methods
- Implement thermal chimney effect
- Start night flush routine
- Eliminate unnecessary heat sources
- Investment: $0
- Expected savings: 15-20%
Week 2: Low-Cost DIY Cooling Solutions
- Install exterior shade screens
- Seal obvious air leaks
- Convert to LED lighting
- Investment: Under $200
- Expected additional savings: 10-15%
Week 3: Medium Investment Summer Energy Savings
- Install radiant barriers
- Comprehensive air sealing
- Window fan optimization
- Investment: $200-500
- Expected additional savings: 10-12%
Week 4: Advanced Passive Cooling Techniques
- Evaporative cooling setup
- Long-term landscaping planning
- System integration and fine-tuning
- Investment: $100-300
- Expected additional savings: 5-8%
Total potential savings: 40-55% reduction in cooling costs
Real Results From Real Homeowners
Sarah M., Phoenix, Arizona: “I was skeptical about passive cooling, but after implementing the thermal chimney and radiant barriers, my July electric bill dropped from $380 to $230. The house stays comfortable until 3 PM most days!”
Mike D., Austin, Texas:
“The night flush technique was a game-changer. Combined with strategic shading, I barely run my AC until afternoon. These natural home cooling methods saved me over $1,200 last summer.”
Linda R., Las Vegas, Nevada: “Living in the desert, I thought passive cooling wouldn’t work. Wrong! The evaporative cooling setup keeps my bedroom 18°F cooler than outside temperature. Best $45 I ever spent.”
Frequently Asked Questions About Passive Cooling
Q: Do these passive cooling methods work in humid climates?
A: Yes, they do! While evaporative cooling doesn’t work so well in high humidity, thermal chimney effects, radiant barriers, and shading methods are great in all climates. Prioritize blocking airflow and heat over evaporative mechanisms.
Q: How much can I really save using DIY cooling methods? A: Homeowners generally achieve 25-40% savings in cooling costs. Your original efficiency, house size, and local climate control savings. Even slight upgrades generally save $500-1,500 annually.
Q: What passive cooling method do I start with? A: With the thermal chimney effect and strategic shading – both are free and provide results instantaneously. These fundamental techniques make all other techniques optimized.
Q: Will passive cooling completely eliminate air conditioning usage? A: In temperate climates, yes. In hot climates, passive cooling greatly reduces AC usage, often limiting use to only the peak mid-day hours.
Q: How quickly do natural home cooling upgrades pay for themselves? A: Most materials will pay for themselves in 1-2 cooling seasons. Labor-based upgrades such as landscaping take 3-5 years but increase property value over energy savings.
Your Cool Summer Starts Today
Passive cooling isn’t just about saving money – it’s about creating a more comfortable, sustainable home environment. These seven proven techniques have helped thousands of homeowners reduce their cooling costs by 40% or more while maintaining comfortable living conditions.
Start with Method 1 tonight. Open those strategic windows, create your thermal chimney effect, and experience the immediate power of natural home cooling. Tomorrow, add exterior shading to your sun-facing windows.
Remember: The best passive cooling system combines multiple methods. As you implement each technique, you’ll discover how they work together to create a naturally cool, energy-efficient home.
Ready to slash your cooling bills this summer? The tools and techniques are in your hands. Your neighbors will wonder how you’re staying so cool while they’re sweating over their energy bills.
Take Action Today
- Subscribe to our Newsletter – Receive expert tips, case studies, and exclusive content on sustainable technology and green materials
Related Articles
- Furniture Upcycling for Beginners: Complete Guide to Getting Started
- Step-by-Step Guide to Building a DIY Raised garden Beds from Reclaimed Wood
- Eco-Friendly Living Ideas: 7 Actionable Steps to Reduce Emissions & Protect the Planet (2025 Guide)
- Automatic Plant Watering System: A Complete DIY Guide
💡 Questions about implementing these passive cooling techniques? Drop us a comment below or reach out through our contact page – our home efficiency experts are here to help!
