Using rainwater can change the game for those who care about the environment. A DIY rain barrel system is a smart, affordable way to save water and help the planet. This guide will show you how to build your own rain barrel system. It’s a step-by-step guide to help you manage your water better and save money.
Table of Contents
Key Takeaways
- Rainwater harvesting can cut down your water bills, especially when it’s in high demand like during the growing season.
- Creating a DIY rain barrel system is a budget-friendly way to save water and live more sustainably.
- It’s important to plan carefully and check local rules before setting up your rain barrel system.
- Using materials like a food-grade plastic barrel makes the DIY process easy and cheap.
- Keeping your rain barrel system in good shape is key to its long-term success.
Understanding Rainwater Harvesting Benefits
Rainwater harvesting is a smart and green choice for urban living. It helps save water and money. Homeowners can collect and store rainwater, reducing their environmental impact.
Environmental Impact and Water Conservation
Harvesting rainwater cuts down on pollution in waterways. It also helps refill groundwater, which is crucial in cities. Using rainwater for non-drinking needs helps save municipal water, especially in dry areas.
Cost Savings and Sustainability
Using rainwater can lower your water bills. For example, 1 inch of rain on a 1,000 sq ft roof can give you 623 gallons of water. On a 150 sq ft roof with 4 inches of rain a month, you can save about 375 gallons, saving around $27 a month.
Local Regulations and Guidelines
It’s important to check local rules before setting up a rainwater system. Some places, like Texas and Virginia, offer help for rainwater harvesting. But, others might have rules about using rainwater. Knowing the local laws helps ensure your system is okay.
Rainwater harvesting is good for the planet and your wallet. It’s a smart move for sustainable living. By knowing the benefits and local rules, homeowners can make a big difference.
Essential Materials and Tools Needed
To make a DIY rain barrel system, you need a few key items. Start with a strong plastic garbage can or barrel, which can hold 20 to 60 gallons. Food-grade plastic barrels are best for collecting clean water, making them a top pick for DIY projects.
You’ll also need a hose bib, washers, a rubber o-ring, and silicone caulk for a leak-free spigot. Cinder blocks will help lift the barrel, and a garden hose will link it to your downspout.
For the tools, get a caulk gun, a drill, a utility knife, and a steel ruler. These will help you measure, cut, and put together your rain barrel system.
For extra flair, think about adding paint, stencils, or a kit to join barrels. These can make your system look unique and functional.
| Item | Description | Estimated Cost |
|---|---|---|
| Plastic Barrel | 20-60 gallon capacity, food-grade preferred | $20 – $40 (used on Facebook Marketplace) |
| Hose Bib | Spigot or faucet for water access | $8 – $12 (on Amazon) |
| Washers, Rubber O-ring, Silicone Caulk | Sealants and connectors | Approximately $10 – $20 |
| Cinder Blocks | Base for elevating the barrel | Around $2 per block (4 blocks recommended) |
| Garden Hose | To connect the barrel to the downspout | Varies based on length and quality |
With these materials and tools, you’re ready to create a DIY rain barrel system. It will help save water and lower your bills.
Planning Your DIY Rain Barrel System
Getting ready for your DIY rain barrel project is key. It helps your system work well and meet your water saving goals. Let’s look at the important steps for planning your rainwater system.
Calculating Water Collection Capacity
To find the best size for your rain barrel, calculate how much water you can collect. Use your roof size and how much rain you get. The formula is: Roof area (sq. ft.) x Precipitation amount (inches) x 0.623 = Water collected (gallons). This will help you pick the right barrel size for your home.
Choosing the Perfect Location
Finding the right spot for your rain barrel is crucial. Look for a flat area near a downspout for easy water collection. You might want to put it on a platform for better water flow and easier access. Also, think about how it will look with your home’s exterior.
Determining Barrel Size and Configuration
Rain barrels usually hold 50 to 100 gallons, with 50-60 gallons being a good size for most homes. Your choice depends on space, water needs, and budget. If you have lots of space, you can link multiple barrels together for more storage.
By planning your DIY rain barrel system well, you’ll start enjoying the perks of water conservation, sustainable living, and urban homesteading.
Step-by-Step Building Instructions
Start making your backyard green with a DIY rain barrel system. It’s easy, whether you’re skilled in home improvement or just starting with eco-gardening. This guide will help you build your own rain barrel.
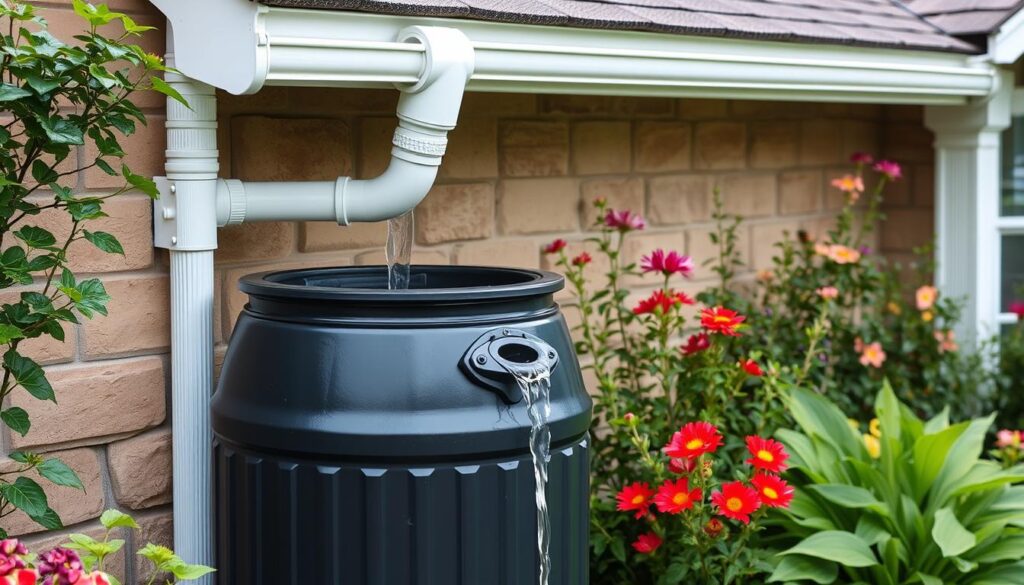
First, clean the barrel well. Then, use a power drill to make a hole 3 inches from the bottom. Install the spigot with an o-ring, washer, and silicone for a tight seal. Cut a hole in the lid for the downspout, so rainwater flows into the barrel.
- Drill overflow holes near the top to stop water from overflowing and damaging things.
- Put the barrel on cinder blocks or a strong platform. This boosts water pressure and makes it easier to use for home improvement and eco-friendly gardening.
By following these steps, you’ll get a rain barrel system that’s both useful and looks good. It will save you money on water and help your sustainable gardening efforts. Start using rainwater and make your home and garden greener.
Installing the Spigot and Drainage System
Setting up the spigot and drainage system is key in your DIY water storage journey. Start by drilling a hole in the barrel for the spigot with a 3/4″ spade bit. Use a lot of silicone caulk under the washer for a tight seal. This makes sure your rain barrel system is leak-free and ready for rainwater.
Proper Sealing Techniques
Sealing the spigot right is vital to avoid leaks. After drilling, put silicone caulk on the spigot threads and under the washer. Tighten the spigot carefully to avoid barrel cracks. Let the caulk dry fully before filling the barrel.
Testing for Leaks
After installing the spigot, test for leaks. Fill the barrel with water and check for leaks around the spigot and barrel. If you find leaks, add more silicone caulk and let it dry.
Overflow Management
For heavy rains, you need an overflow system. You can drill holes near the top or use an overflow valve. Linking multiple barrels with a kit also helps manage overflow and increase storage.
By following these steps, you’ll have a reliable, leak-free DIY water storage solution. It will help a lot in your sustainable living efforts.
| Feature | Recommendation |
|---|---|
| Spigot Size | 3/4″ |
| Sealing Material | Silicone Caulk |
| Overflow Management | Drilled Holes or Overflow Valve |
| Barrel Linking | Linking Kit for Increased Capacity |
Connecting to Your Home’s Downspout
Connecting your rainwater harvesting system to your home’s downspout is key. It makes sure you collect and store rainwater well for gardening and home projects. Let’s look at how to connect your rain barrel to your downspout easily.
Using a flexible downspout extension or a rain barrel diverter is common. These tools help attach the rain barrel to your downspout. You might need to cut the downspout to fit the rain barrel.
After connecting, check for leaks or blockages often. A clear flow of rainwater into your barrel is crucial. Regular checks and small fixes keep your system working well, giving you clean water for your home and garden.
| Rainwater Harvesting Tip | Benefit |
|---|---|
| Use a flexible downspout extension or rain barrel diverter | Allows for a secure and customizable connection to your home’s downspout |
| Periodically check for blockages or leaks | Ensures the unobstructed flow of rainwater into your barrel |
| Cut the downspout if necessary | Accommodates the placement and connection of your rain barrel |
Connecting your rain barrel to your home’s downspout is vital for a good rainwater harvesting setup. By following these tips, you can connect your barrel smoothly. Then, enjoy the perks of eco-friendly gardening and green home improvement projects.

Filtering Systems and Debris Management
Keeping your rainwater collection system clean is key for water conservation. It also makes sure your water is of good quality. To stop debris and contaminants, use a fine mesh screen or landscaping fabric over the opening. This keeps leaves, twigs, and other organic matter out, and also stops mosquitoes from breeding.
Screen Installation Methods
Cut the screen or fabric a bit bigger than the barrel’s opening. Then, use a bungee cord or hose clamp to hold it in place. This creates a tight seal to block out unwanted particles. Always check and clean the screen to keep water flowing well and staying clean.
Maintenance Requirements
- Remove debris that builds up on the screen or fabric regularly.
- Add mosquito dunks to the barrel to stop mosquito larvae from growing.
- Check the system for clogs or blockages and fix them quickly to keep water flowing well.
Using these easy DIY tutorials for filtering and managing debris, you can make your rainwater harvesting system work better. This helps you live more sustainably.
| Debris Filtering Accessories | Benefits |
|---|---|
| Fine Mesh Screen | Effectively filters out leaves, twigs, and other larger particles |
| Landscaping Fabric | Traps medium-sized debris while allowing water to flow through |
| Mosquito Dunks | Prevents the breeding and growth of mosquito larvae |
Elevating and Stabilizing Your Rain Barrel
To get the most out of your DIY rain barrel system, you need to elevate and stabilize it right. This step not only makes your outdoor area look better but also boosts water pressure and makes it easier to use. Follow these simple steps to build a strong, level base for your rain barrel. This will keep it safe and working well.
Begin by lifting the barrel with strong cinder blocks, bricks, or a wooden stand you made. This makes it easier to get to the spigot and improves water pressure for better watering. Make sure the surface is flat and stable to avoid the barrel tipping over. This could cause leaks or spills.
- Use two stacks of 8-inch tall cinder blocks to create a stable, elevated platform.
- Alternatively, construct a custom wooden stand or platform to match the height and size of your rain barrel.
- Level the surface by adjusting the cinder blocks or wooden supports until the barrel sits evenly.
After placing the barrel, add some decorations around it. Put mulch or pea gravel around the cinder blocks or wooden stand. This makes the area look neat and blends the rain barrel into your outdoor space.
By elevating and stabilizing your rain barrel, you make it work better and look nicer. It becomes a key part of your DIY home improvement projects and water storage solutions. With a solid, level base, your rain barrel is ready to collect and use rainwater for your garden and DIY tutorials.
Advanced Features and Customization Options
As you explore sustainable living, your DIY rain barrel system can get better. You can add advanced features and customize it to fit your needs and style.
Multiple Barrel Connection Systems
Linking multiple rain barrels together is a great way to store more water. This is perfect for eco-friendly gardening and saving water. The system makes sure water is distributed well and uses your outdoor space wisely.
Automated Irrigation Setup
Make your rain barrel system even better with an automated drip irrigation setup. It connects to your barrels for easy watering. This saves time and makes sure your plants get rainwater regularly, without you having to do it.
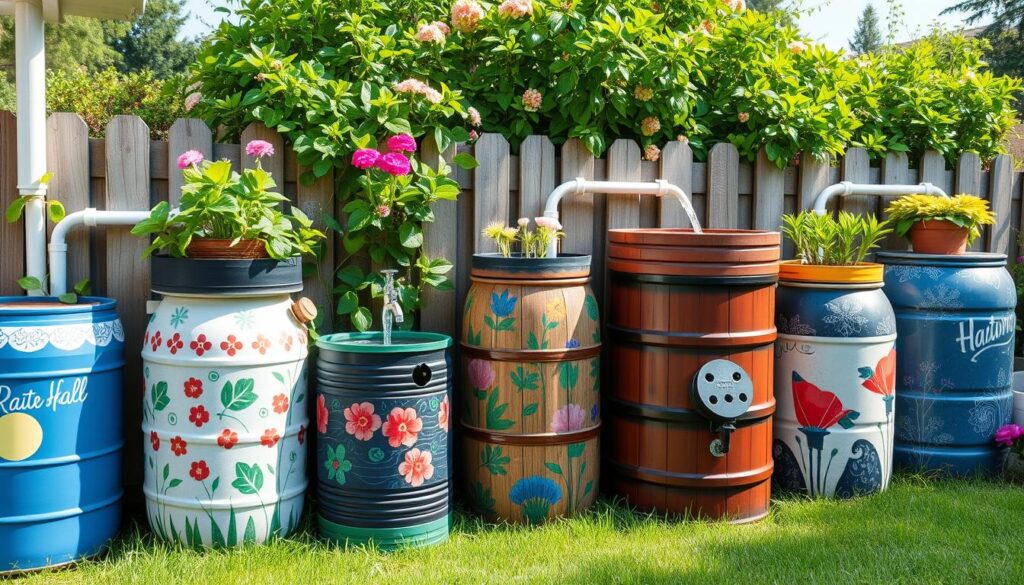
You can also make your rain barrels look good by matching them with your home or garden. Use weather-resistant paint or add decorations. Even potted plants can make them look nice and add to your outdoor space’s beauty.
There are many ways to customize and improve your DIY rain barrel system. By trying out these ideas, you can make a system that’s both efficient and beautiful. It will help you reach your water conservation goals and make your space more sustainable.

Seasonal Maintenance and Care
Keeping your DIY rain barrel system in good shape is key. It helps with water conservation, sustainable living, and eco-friendly gardening. Regular care can make your rain barrel last longer and work better all year.
First, check the barrel for leaks around the spigot, connections, and seals. Fix any leaks fast to avoid water loss and damage. Also, clean the mesh screen on the barrel’s inlet to keep water flowing and stop debris from building up.
In cold areas, you need to winterize your rain barrel system. This means draining it completely and taking it off the downspout to avoid freezing. Keep the barrel upside down to stop water from getting in and causing cracks.
- Inspect the barrel for leaks and fix any problems.
- Clean the mesh screen often to keep water flowing.
- Winterize the system in cold places by draining and storing the barrel upside down.
By following these seasonal maintenance and care steps, your DIY rain barrel system will keep working well. It will help with water conservation, support your sustainable living goals, and aid in eco-friendly gardening for many years.
Maximizing Your Water Collection System
Rainwater harvesting is a great way to save water. A DIY rain barrel system can help you collect and use rainwater. This can save you money, keep your garden green, and help the environment.
A rain barrel system is very flexible. You can use the rainwater for many things like watering plants, washing cars, and cleaning outdoor gear. Rainwater is better for plants than tap water because it lacks harmful chemicals.
When there’s a drought, your rainwater can keep your garden healthy. Think about using a drip irrigation system. It delivers water directly to the roots, saving water and keeping plants well-watered.
| Rainwater Barrel Type | Popularity Ratio | Cost Range |
|---|---|---|
| Plastic Rain Barrels | 3:1:1 | $130 to $300 |
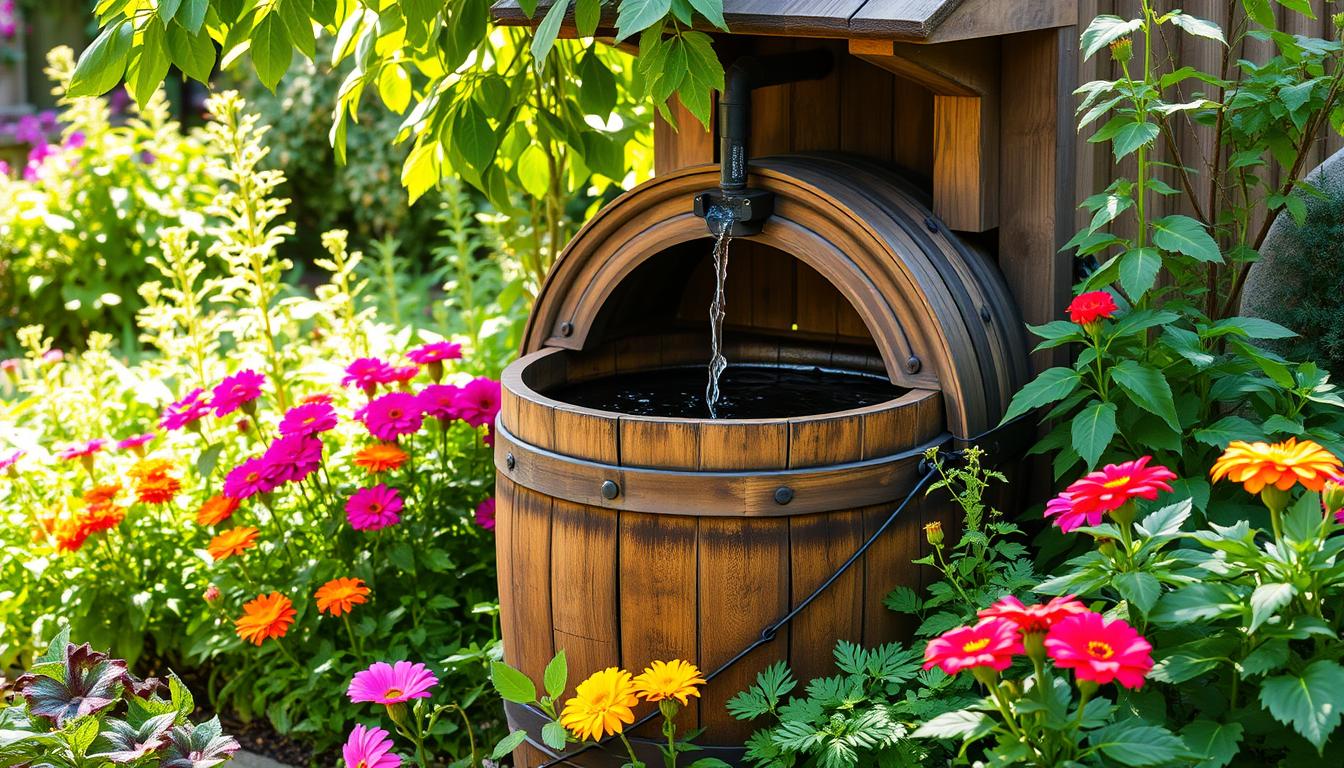
| Wooden Rain Barrels | 3:1:1 | $300 to $500 |
| Decorative Rain Barrels | 3:1:1 | $200 to $400 |
| Metal Rain Barrels | 1:1 | $100 to $300 |
Setting a budget and thinking about what you need can help you find the right rain barrel system. It’s a smart choice for sustainable living and saving money. Rainwater harvesting also helps protect our environment and natural resources.
Conclusion
The DIY rain barrel system is a great way for homeowners to save water and cut down on utility bills. It also helps in living more sustainably. By following the guide, you can make a rainwater harvesting system that fits your needs and helps the environment.
Keeping your rain barrel system in good shape is key. This means cleaning filters and managing overflow properly. Adding features like connecting multiple barrels or setting up automated irrigation can make your system even better.
Rain barrels work for any garden size, from small balconies to big backyards. Rainwater is soft and full of nutrients, making it a smart choice for your garden. By using a DIY rain barrel system, you can make your home more eco-friendly and self-sufficient.
Take Action Today
- Subscribe to our Newsletter – Receive expert tips, case studies, and exclusive content on sustainable technology and green materials
Related Articles
- DIY Solar Fountain: Create a Relaxing Water Feature in 1 Week
- Step-by-Step Guide to Building a DIY Raised garden Beds from Reclaimed Wood
- Eco-Friendly Living Ideas: 7 Actionable Steps to Reduce Emissions & Protect the Planet (2025 Guide)
- Automatic Plant Watering System: A Complete DIY Guide
- DIY Compost Tumbler Mastery: Transform a 55-Gallon Drum into a High-Efficiency Composting Machine

